Hopefully every photo is self-explanatory.. ;D
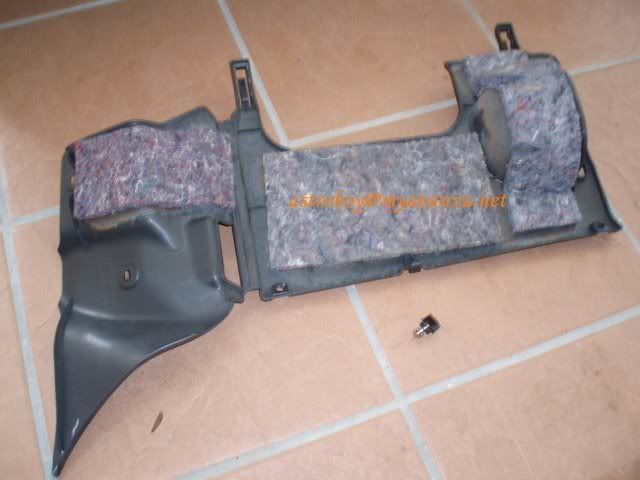
Lower dashboard cover. Check out the OEM cotton insulation.. ;D
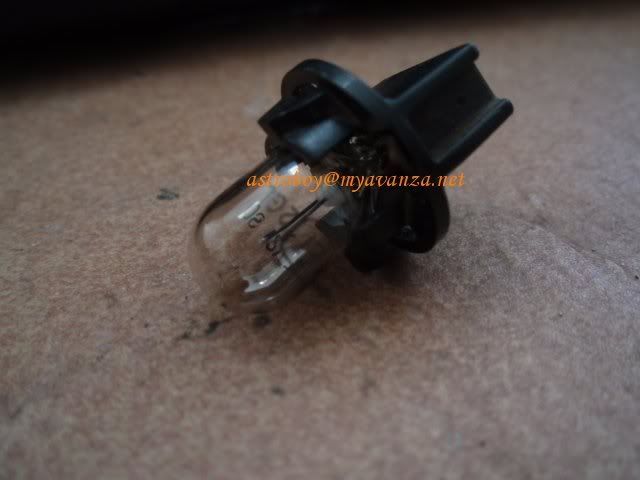
This is the main ingredient.. ;D
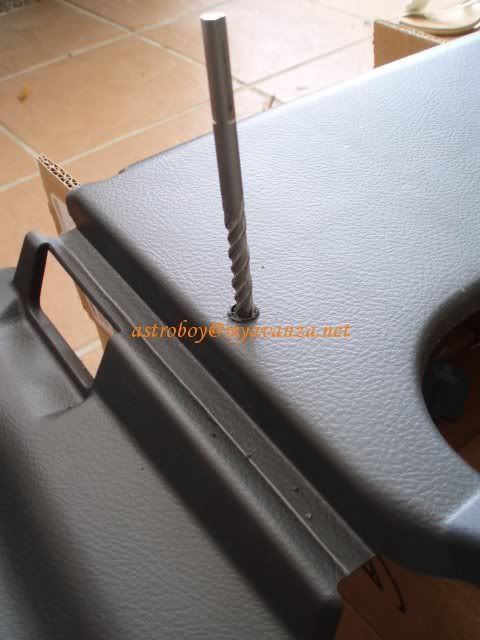
First drill..
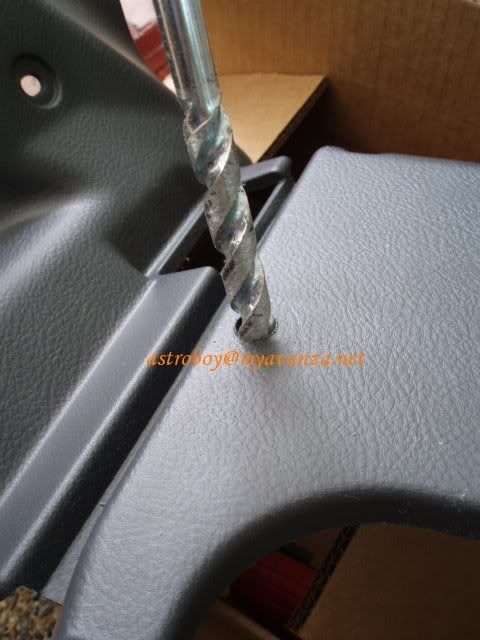
Second drill.. to make it bigger..
Nice and easy does it...
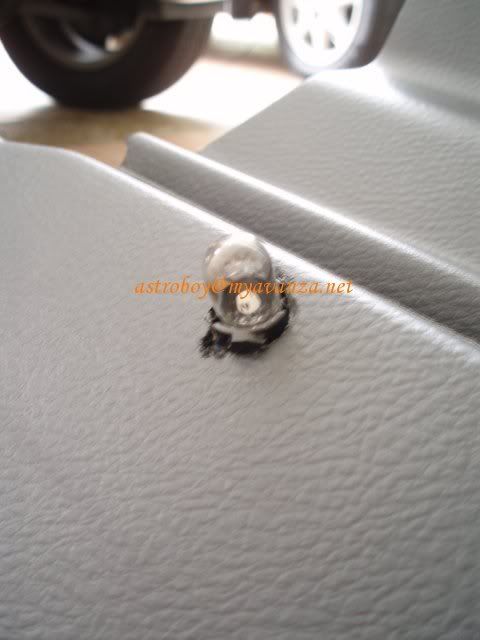
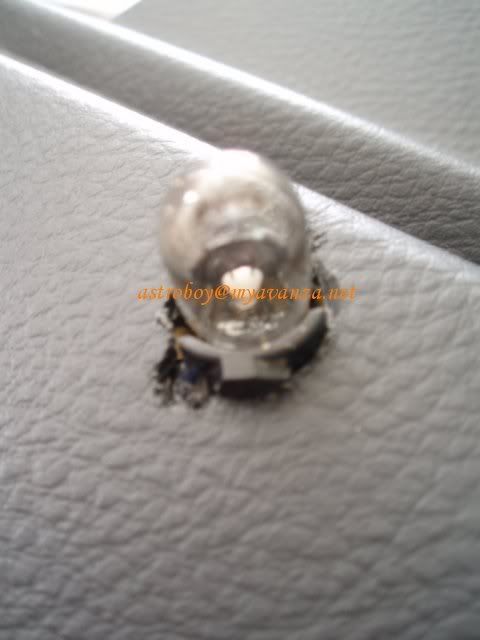
Close up..
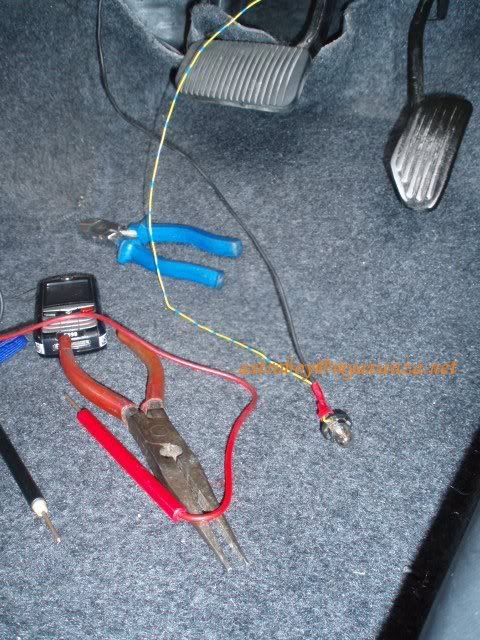
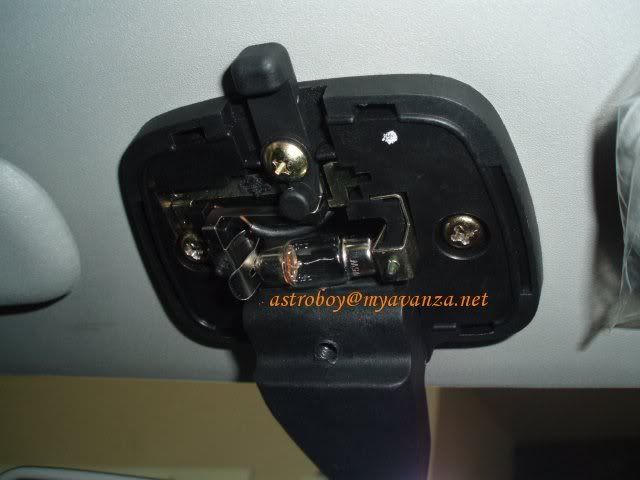
Black is earth and it goes directly up the windscreen pillar, then under the roof sarong and to the room light, connect to the -ve plate as the main trigger for the foot light.. check out next 2 photo.
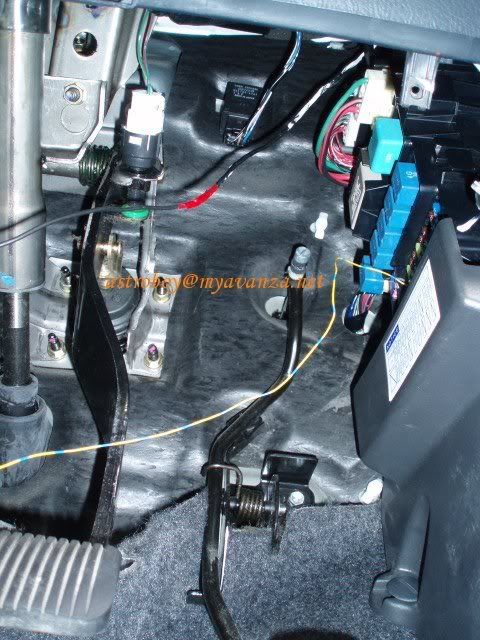
See the black cable going up the windsceen pillar and live (blue/yellow) cable going to the fuse box to tap from the hazard fuse. I CAN'T find the room light fuse :-/ . I unplug every fuse in the fuse box and to my surprise, the room light still lited!!! How dangerous can that be!!! :o OUR CABIN LIGHT HAS NO FUSE !!!
This is how the black earth -VE trigger cable is connected. The right side is actually un-fuse-ed LIVE!! I am just tapping the -VE signal.. One problem here. When other ppl remove my rear view mirror, they sure can't connect the cable.. :-[ I should have solder the wire properly and install a connector. But my tool box only have limited things.. :-/
DONE!
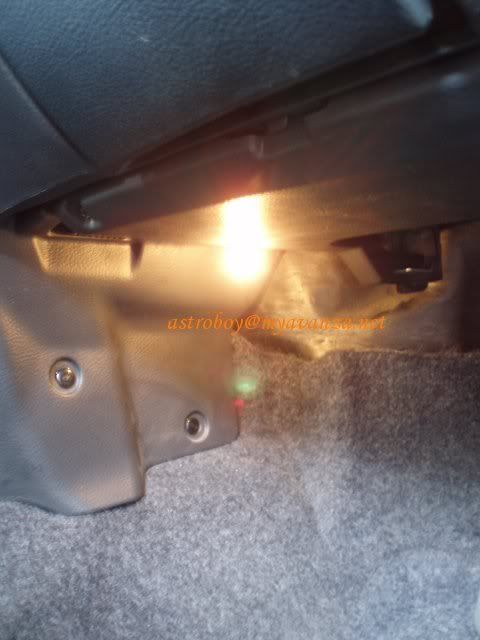
Wider view..
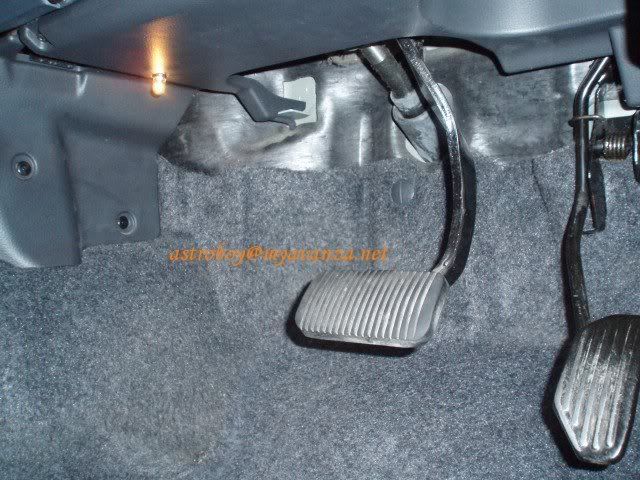
One thing though, my foot light gets very HOT after lited for a while. Potential recipe for fire hazard. Using LED is safer. Please take note.. ;)
Warning.. this is a pretty high risk DIY for 4 reasons:
1. one of the terminal in the room light is constant-ON LIVE and un-fused. Accidently touching it with an earth cable will melt the earth cable and may cause fire.
2. our foot light has one constant-ON LIVE connection too, make sure you tap the right end of the Hazard fuse, its after the fuse, not before the fuse which the fuse will not be able to protect..!
3. The bulb fixture I used is very difficult to secure the wire connection. So if the LIVE is loose, its dangling end may touch the surrounding earth and causes sparks, then potential fire hazard! Plenty of cotton inside, refer 1st photo.. :-/
4. When we send vehicle for servicing, the foreman are not aware that we have such DIY, if he pulls the rear view mirror off or the upper foot panel off without unpluging our DIY, may potentially damage the cables and cause fire due to the live wire! not one but both end!
PLEASE TAKE NOTE!
Aiyaa, all DIY has certain risk la.. its just that I felt this one is a bit greater. Unless you isolate the foot light from the room light but to me, then it defeat its purpose.. :-/ Its suppose to lit when we open the door, or switch on the room light, before inserting the key. Just like our room light.
Hi,
ReplyDeleteAs I understand the electrical connections to the original footwell lights come from the FRM module. There are specific points for that there (that is why there is no fuse for the internal lights, since they are controlled by the FRM (next to the drivers kick panel). What some people have done is that they have connected the DIY footwell light live wire to a pink and purple cable under the dash (E46)and the earth to any earth point and that has worked. I have thought of doing it too in my E90 but have not got around to it yet.
Sorry, it was the red wire with blue stripe as shown here (under the dash)that you are supposed to connect to the footwell light so that it comes on with the dome light.
ReplyDeletehttp://www.bimmerfest.com/forums/showthread.php?t=465564
Hi, Raj, TQ for dropping by.. The job I put up was for my Toyota mini MPV.. For BMW, I dare not touch the circuit.. Worry of frying any of the costly controller module or accidentally fired the airbags.. 😅
ReplyDeleteHi, Raj, TQ for dropping by.. The job I put up was for my Toyota mini MPV.. For BMW, I dare not touch the circuit.. Worry of frying any of the costly controller module or accidentally fired the airbags.. 😅
ReplyDeletesorry, I was too focussed on the BMW and did not realise it was the Toyota that you referred to.
ReplyDeleteThis comment has been removed by a blog administrator.
ReplyDelete